Friday, May 8, 2020

The Greeting Farm - Grocer & Cashier

I just wanted to thank our local grocer people for showing up every day and The Greeting Farm had some great digi’s for that!   On the inside the card says "Cuz we like to eat"...LOL!


These images are Cashier B and Grocer A which I've merged by using Word.  


I even added a little grocery cart that I cut using my Brother Scan 'n Cut.  Cute!!  

So grateful to be able to say thank you in this way.  The Greeting Farm continues to add more fun digi images to their site for us to play with.  A way of accessing instant gratification, especially for someone like me who lives in Canada.  Normally, I would have to wait for weeks before having clear stamps arrive so I love this option.  

What inspiring idea's have you used to say thank you?  I might need to borrow one or two.  💕😁

Keep safe everyone!
Hugs,
Eulanda

Copics used:


Friday, May 1, 2020

Winnie Graduation PD

WOW what a different year for grads!  👨🏻‍🎓👩🏻‍🎓  Today I am sharing a grad card because even tho the ceremonies and celebrations are off (hopefully only postponed) doesn't mean we still can't make a special grad card.  💖


Isn't she pretty?!!!  I love how you can customize any digi with special colors for different events or people.  And even better?  "Graduation You Passed" is available in the normal black and white line art but also pre-colored as well as a pre-colored ethnic option.  FABULOUS choices I think!  😁


I added some chipboard balloons 🎈 but covered them with a really ultra thick embossing powder to make them pop a bit more.  I figured I needed a tassel embellishment but I don't have a lot of gold or yellow in my stash.  It's just not my go to color for making anything but I did find some thin Dollar Store ribbon!!  Woo hoo ok well,  then MAKE ONE!  That's the great thing about being a crafter right?


Great embellishments to add on a grad card are always stars.  ✨  I will mention they are also great for any masculine cards as well.  


Congratulations to all the grads this year. 🎉🎈🎊 I'm so sorry that things have gone the way they have and I really hope you end up getting some kind of function to celebrate with all your friends and family.  It's truly an amazing time in your life and one that you've worked at for over 12 years so you deserve something!

Take care of yourselves out there! 💕
Hugs,
Eulanda

Copics:
E000, 00, 04, 11, 21, R20
B91, 93, 95, 97, 99
Y11, 15, YR23, 24
W1, 3, 5, 7
E42, 43, 47, 49
E50, 51, 53, 55

Sunday, April 26, 2020

POLKADOODLES GIVEAWAY!!!

Don't you think it's time for a giveaway?  See entry details below and this is the package you could win.  Some fresh off the press dies and a paper pack!  


You have the potential of as many entries as you'd like.  You get 1 entry for the following:

Commenting on my Instagram HERE
Tagging a friend(s) on my Instagram HERE
Commenting on my Facebook HERE
and leaving a comment HERE on this blog post. 

This contest is open to anyone and closes May 2/20 and winner will be announced May 3/20.

GOOD LUCK!

Friday, April 24, 2020

Winnie - Ice Cream Treats

Using sentiments isn't something I did much of, prior to being on the DT at Polkadoodles but the Posydoodle Tags and Sentimentals make it so much easier!!!


I chose to use one of the newer paper pads called Vintage Candy.  One of the papers is full of butterflies so I fussy cut all of these ones but then I scanned, traced and cut the teal colored ones using my Brother Scan and Cut.  I popped those together with glue and curved the wings to add more dimension.


Aren't they pretty?!!


Here are some pieces that make up the base of my card.  I've used the largest die from the Elegant Nest set and then ran it through an embossing folder.  Then I added my image using some foam tape for even MORE dimension!  I found a nice border die from my stash as well as some pretty ribbons for layering.


This little cutie is called "Ice Cream Treats" and I've used the clear polymer stamp.  Check at your local stockist or scoop up (no pun intended 🤣🤣) the black and white digi version from the store. 


Then I went crazy with my embellishments from my stash.  I've popped another dimensional butterfly atop my bouquet and snuck in a shabby chic bow under it all.


I hope you've enjoyed my treat card today!

Thanks for stopping by,
Hugs,
Eulanda


BG10, 11, 13, 18
RV11, 32, 34, R85
Y11, Y15, YR15, E35
E51, 53, 43, 47

Friday, April 17, 2020

Ruby Gift

Good day!  Eulanda here and it's my turn to show how I use my Brother ScanNCut for a background layer behind my die.


I absolutely ADORE dies and that is one thing I will NOT give up even tho I have a Brother Scan and Cut AND a Silhouette machine.  Dies are so nice and easy to just grab, throw through your cutter and voila!!  However, what I LOVE that I can do, is put a background behind any die that I use as shown here.  On the left side, I have die cut the new 
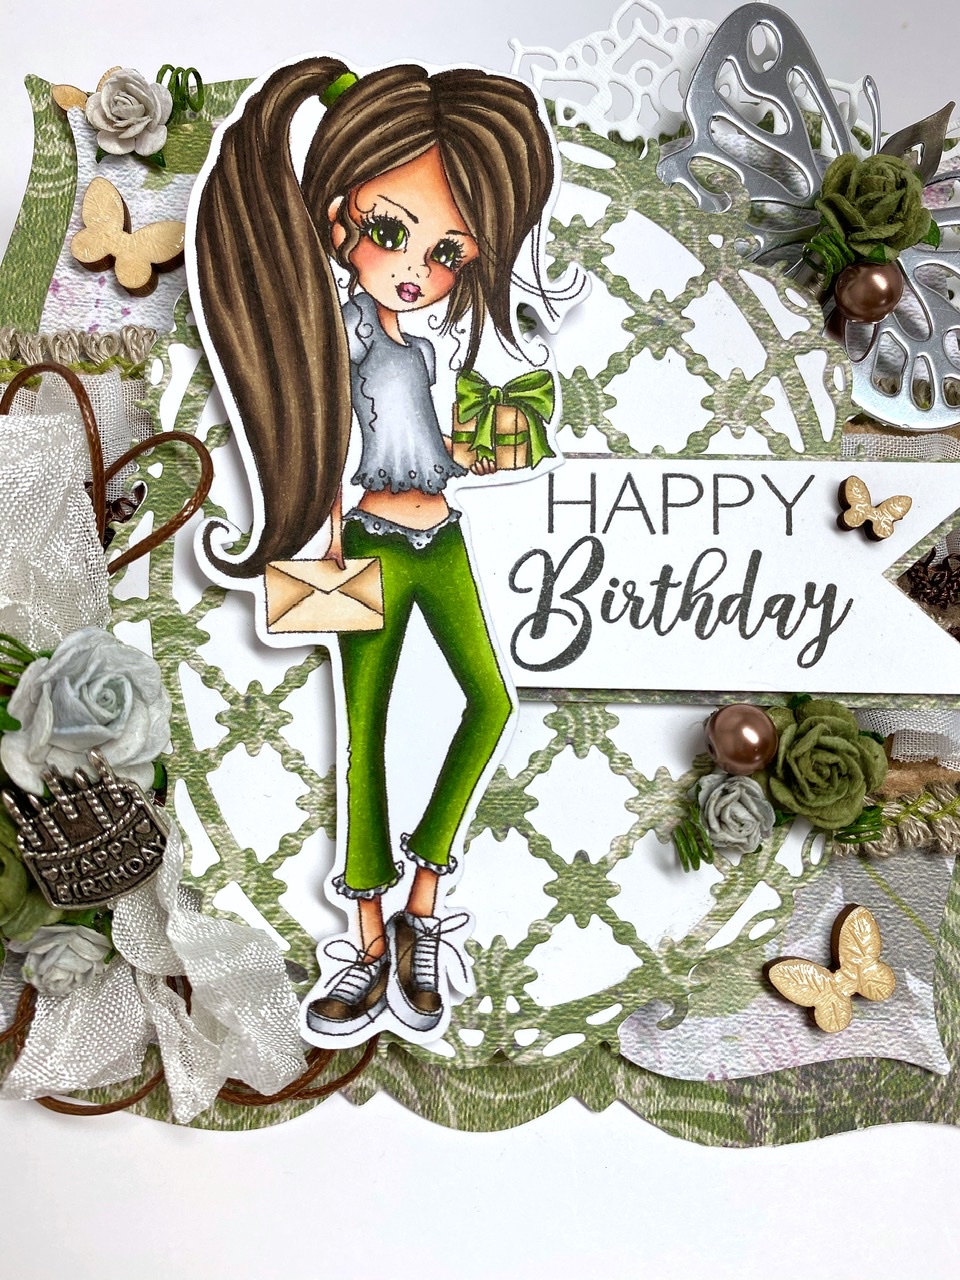
Oval Trellis Die and stuck it on to my cutting mat and then had my ScanNCut scan it first.  Next, on the right, after making my proper selections, I sent the image to be cut with some white cardstock to fit in behind my die.


Here is the white layer you see behind the Oval Trellis Die and it's a perfect fit!  I've used Nikky's AWESOME AWESOME AWESOME Ultimate Graphic 160gsm paper to print out some patterns from the Eden Collection - Paper Heaven 1-10.  I can't say enough about how amazing this paper is to print on.  A photo just doesn't do it justice but be it the printable selections in the store or the patterned paper it's totally worth it!!  


For this birthday card I've used Ruby Gift digi but also available is Ruby Gift  - the precolored image, which is perfect for a quick card!  I also added a saying from the Perfect Wishes sentiments clear stamp set.


Isn't this little bouquet just so pretty?!!  I have my wax cord and seam binding bows under a few flowers and a little happy birthday charm I found in my stash.  Woo hoo!


I die cut this pretty butterfly from the Butterfly Trio set, from some pretty silver foil paper then popped a Tim Holtz nib, flower and little colored pearl on top.


I hope you like my card for today!!  I felt like I stretched my mind with this one.  I have no idea why, do you get some of those?  Thank you for stopping by!

Hugs,
Eulanda

Copics:
N0, 1, 3, 5
YG03, 63, 67, G99
E43, 44, 47, 49
E50, 51, 3, 55
E000, 00, 04, 11, 21, R20

Friday, April 10, 2020

Winnie - Sky's the Limit

Today I've decided to share a slimline card with you, which I am LOVING but you really have to think about how to fill space vertically!  😮


Here I've cut my base then rolled the scalloped slimline die through my die cut machine.  Next I cut my cloud patterned paper is from Work & Play 1-10 Paper Heaven.


Here are all my layers adhered together and I used foam pop up dots to build height on my card.  I love dimension!!


I picked papers from the Mermazing Ocean 6 x 6 paper pad to use for my grass and sun elements.  Also for layering my sentiment from Sentimentals 6" x 6" paper pack.  It comes with sooooo many sentiments it makes picked out the perfect saying super easy!  The Posydoodle Tags are a perfect addition for the sentiments as it comes with 5 different tags for you to choose from.  

I also cut some tree's for my forest from the Iced Branches die set and added the leafs from thew new Super Sprigs die.  Oh I think you're going to see a lot of that on my cards going forward.  What a handy die!


I've colored Winnie using my copics and this image is called Sky's the Limit, which you might be able to find at your local stockists as it does come as a clear polymer stamp.  If you can't find it there, it's in in the store in black and white and precolored, which some days is super handy if you need a quick card.


I hope you've enjoyed my card for today!!  I certainly enjoyed making it!

Have a crafty day!
Hugs,
Eulanda

E42, 43, 47, 49
E000, 00, 04, 11, 21, R20
E11, 08, 17, 15, 18
RV00, R81, 83, 85, 56
BV20, 23, 25, 29