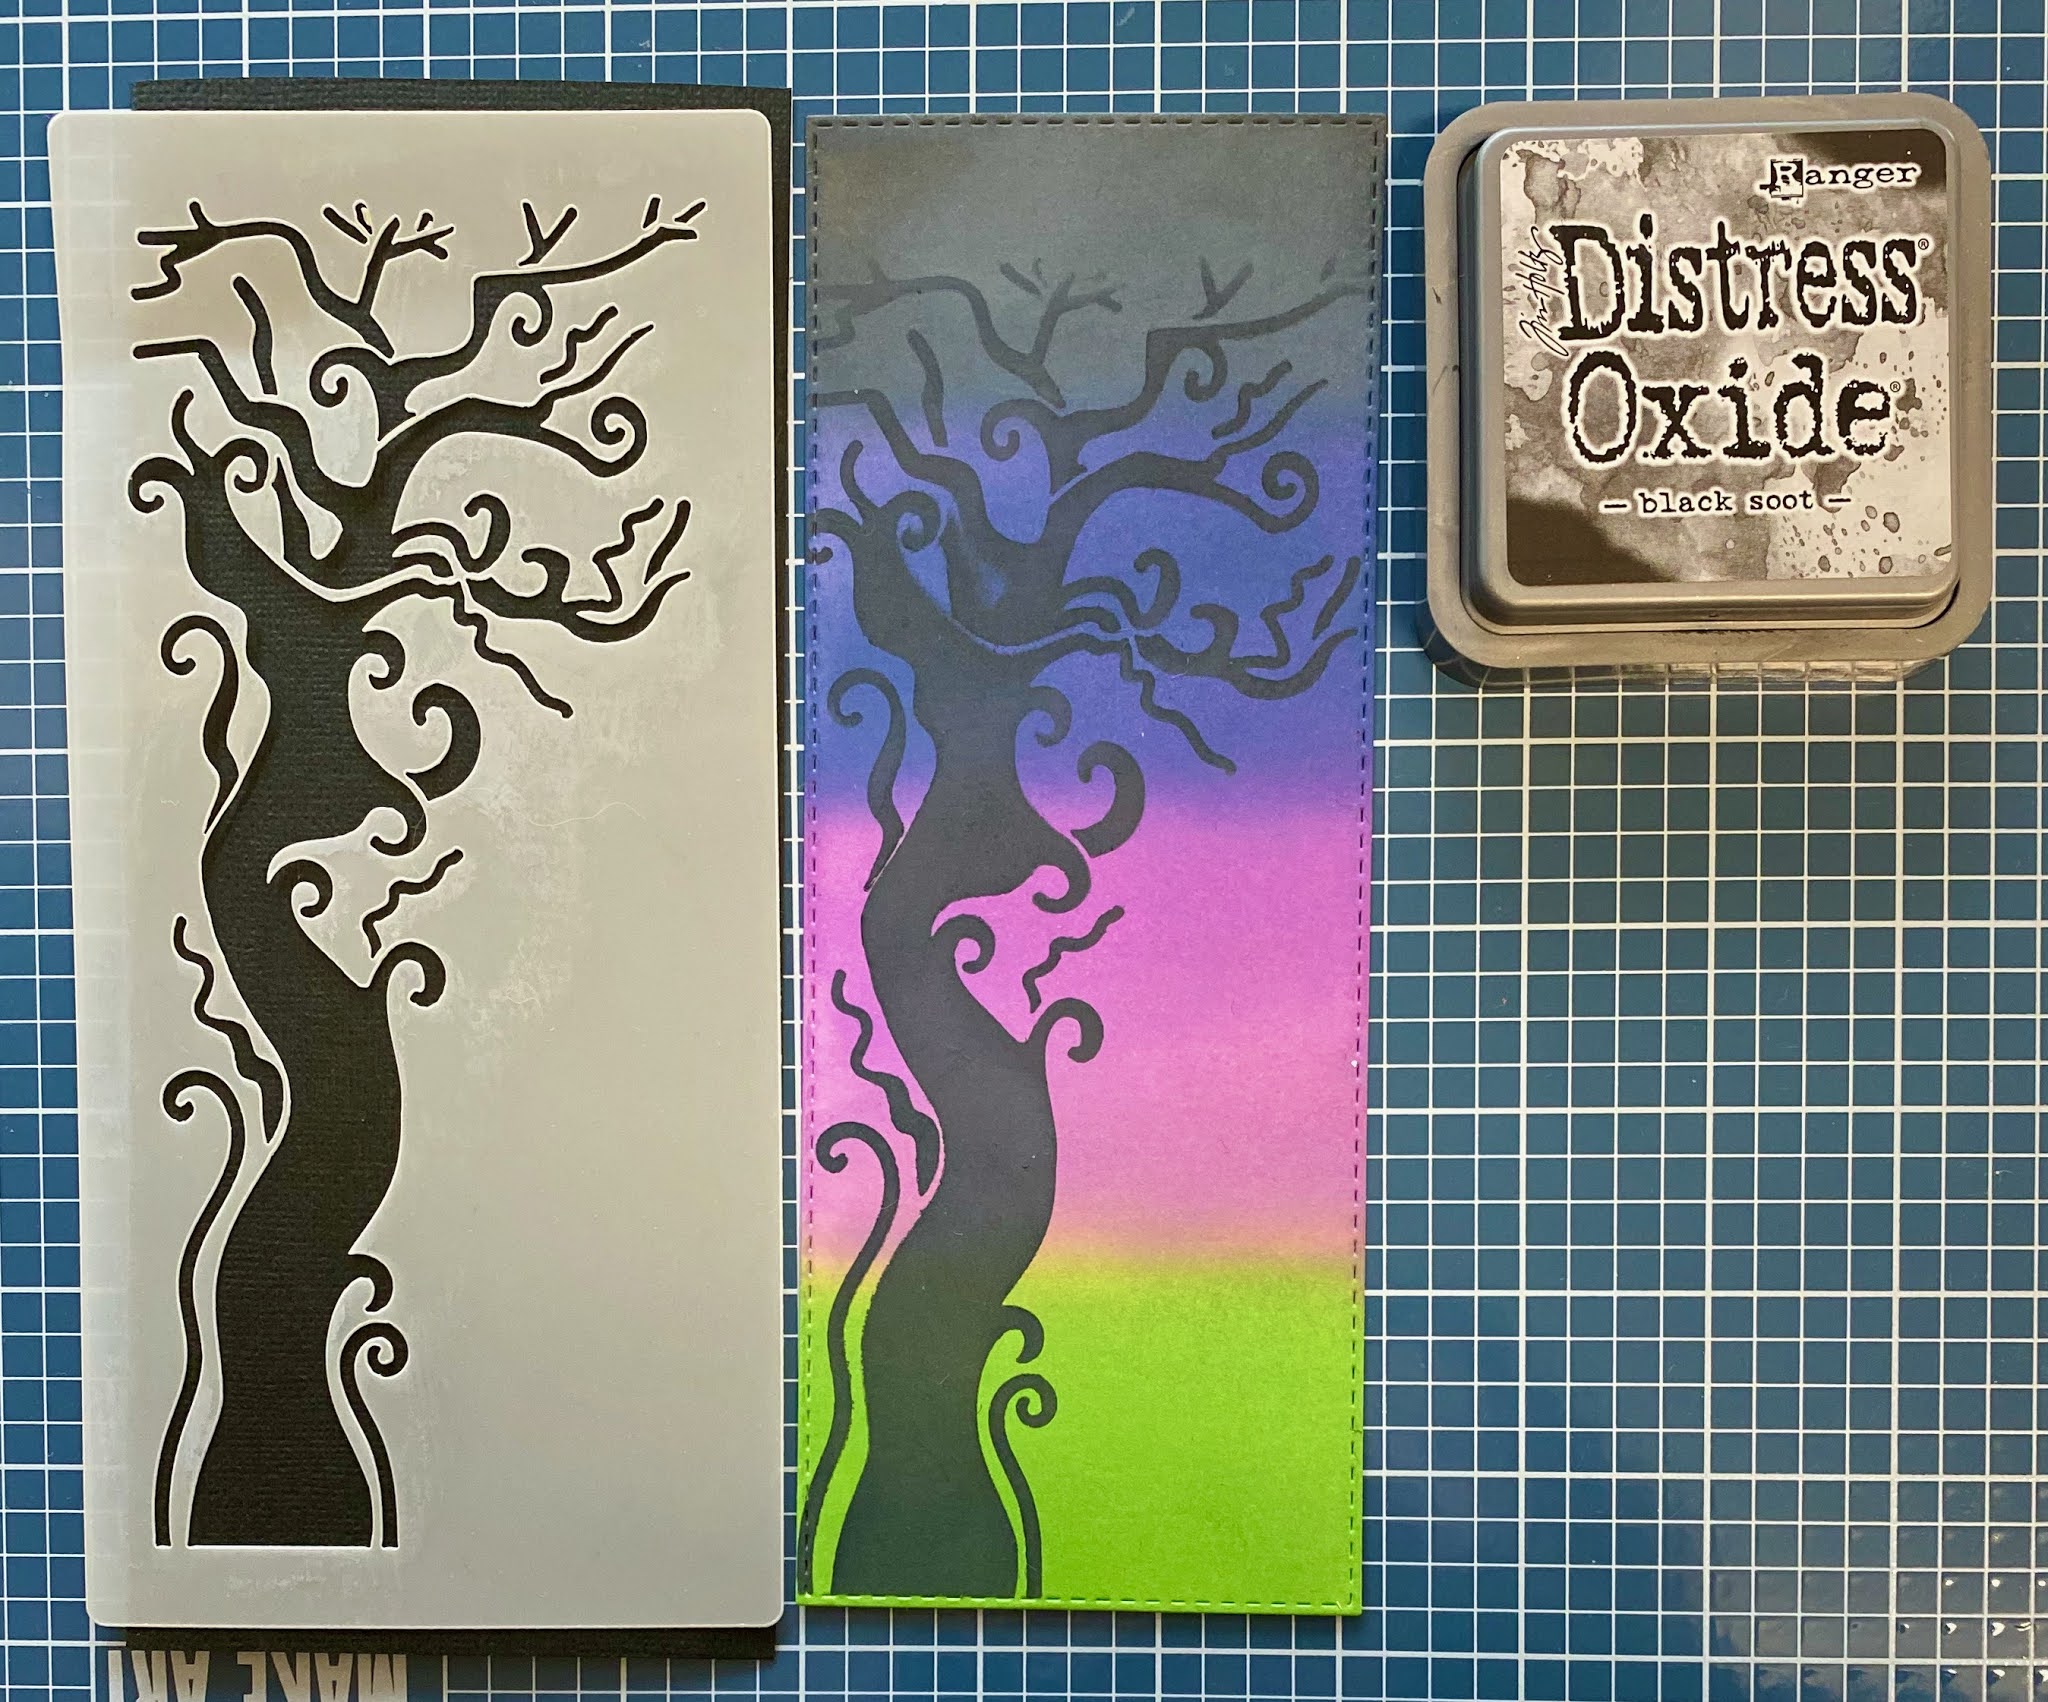
Hi there! Today I'm going to share a shaker card featuring some new Boneshakin goodies!! I started by using the Grungey Slime halloween stencil but didn't actually make it that grungy. 😂 Next time I'll try green or gross red. LOL! I first did the stencil in black distress oxide and then covered it with Rangers Stickles Asteroid glitter gel. Looks super sparkly in real life. I used a piece of design paper from the "Boneshakin Halloween 6" x 6" paper pad, which by the way, has a bunch of fun and very traditional Halloween patterns and colours. Love that! 🎃
Friday, October 2, 2020
Polkadoodles Boneshakin Shaker Card
I was on a tear colouring up a bunch of these cuties at the same time and used my copics. I really like how her hair turned out!! OH and speaking of "her", this is Best Witches Winnie Wednesday clear stamp set. Isn't she cute with her little kitten?! 🥰
I've stamped a sentiment from the Boneshakin Halloween Winnie Wednesday stamp set, on to some copic paper and then did a graduated colouring to add some colour. They looked kind of plain when I had them on just white paper so I wanted to pump them up a bit. 😀 I also put some foam dots behind for a bit of dimension.
Here is a little shaker video to see the movement of the shaker guts. Yes that's a technical term "shaker guts". 😂😂
For those of you who normally have kids that trick or treat I hope something gets sorted out to allow them to collect some goodies. I know it won't be the same as any other year but what is these days?
Hugs to all and thanks for stopping by! 💕
Eulanda
Friday, September 25, 2020
Happy Halloween Winnie
Hello there and welcome back to my very traditionally coloured Halloween card.
I used a piece of design paper from the Boneshakin Halloween paper pad and added some black soot distress ink oxide over the Spider Web halloween stencil. It's a very subtle addition and DANG now as I'm writing this I was just thinking how cool it would have looked in white! I JUST GOT SOME WHITE INK TOO!! Apparently not use to having it. LOL! You can also get this in a package of 5 Halloween Layering stencils, which would be my personal preference. 😀
I've popped one of the two main images from the Happy Halloween Winnie Wednesday clear stamp set atop of the largest Elegant nest die. This stamp package comes with 11 stamps including sentiments and accessory stamps. ADORABLE!! 💕 I've added some spider web (fake since I don't have a spider farm to create it for me) over the die, flowers and tree. Ya ... a little creepy but isn't that the point? 😂😂 The sentiment came from another set called Boneshakin Halloween Winnie Wednesday.
Here is another pic of the tree with spider web draping over it. I just had to add the little blingy spider next to the tree cuz that's just plain cute. 😆
I know some countries don't celebrate Halloween but if you live in one do you make them anyway? I used to dress up in costumes when I was younger but now we live out in the country and we don't even get any little trick or treaters to give out candy to. I suppose this year is going to be a very strange one and I feel so bad for all the little kids but I'm sure something fun will get figured out for them.
Hugs to all and thanks for stopping by!
Eulanda
Tuesday, September 22, 2020
You're Terror-ific
Hello and welcome back so quickly! LOL! I'm sharing how I created my distress oxide ink background but just by pics this time. 😀
I have cut my slimline piece out and used my distress oxide brushes to colour in each section. I've also added all my colours in case you wanted to try it for yourself. This is one of my favourite techniques for Halloween cards 👻🎃but slowly becoming a favourite for many others. I love designing Halloween and Christmas cards the most! What about you?
I made kind of a mistake when I layered my tree over my finished colouring. I wanted some black and white splats but when I got to this point I went...oooohhhh. Dang it how will I fix this?! I could have just left it because it's still pretty just the way it is. And by the way, there are quite a number of new stencils in the store. Have you seen them yet?!! Ooooooo...you can buy this one by itself, Creepy Tree Halloween stencil, or in a pack or 4 called Halloween Layering stencils. I like this last option better. 😂😂
So to fix my little dilemma, I inked up the tree stencil again and then cut it out on my Brother Scan n Cut. I will say this is definitely the lengthy way of layering (LOL) but it worked! I used the mask to cover my tree and then went to town and added my white and black splats.
Isn't' she just the cutest? New to the store and wouldn't she be a great addition to your Halloween inventory? Happy Halloween Winnie Wednesday clear stamp set but there are a few more to check out too. I coloured her up using my copics and sorry I didn't create a list this time but if you're curious about one please leave a comment. How cute is her little kitten?! This set actually comes with 2 main images, a few sentiments and accessory pieces for a total of 11 clear stamps. 😀
Again I used my Great Outdoors 6" x 6" stencil to trace out some clouds.
So do you ever add a distress ink background to your cards? I just started this past year so it's relatively new to me. Buying up all the distress ink oxides (my favourite) and stencils now. 😂😂😂
Thanks so much for stopping by today!
Hugs,
Eulanda
Friday, September 18, 2020
GIVEAWAY and Background Video Tutorial
Today and I have a background tutorial for you using distress oxides so stick with me until the end and I'll share the link with you there. I also have a GIVEAWAY so you might want to check out the details on that as well!! 🥳😀
I have lots of info to share with you on this card today but first the main actors of this scene are from the Funky Monsters and Freaky Monsters clear polymer stamps. Aren't they just super cute?!!! I've also use the Little Monsters Digi papers, well only one design paper but they are just adorable!!! There are actually 12 different designs and don't forget to watch out for Digi Chooseday held every Tuesday where there are always discounts on digi items. 😀
ha ha ha these little guys crack me up! Well the fun thing about a stage like this is that you can colour them anyway you like!! It's your spacey scene so go for it!!
I used this sentiment from the Little Monsters digi messages and what a selection there is! I am horrible at coming up with words to say inside and out so this makes it so much easier!
For the clouds I cheated somewhat. Hee Hee I traced the Great Outdoors Stencil clouds onto vellum and also glitter paper and then had my Brother Scan and Cut actually cut them. Now you could also use scissors. In some cases I'm sure it would be quicker than setting up your machine but I just wanted to share how you could use some of the PD stencils as dies!!
I hope you like my crazy slimline card. I even added some sticky dots for some planets or ... who knows?!! Maybe that's what these guys live with up there - floating dots. LOL!! I just thought they were fun! 😂😂
GIVEAWAY
It just so happens that I ended up with an extra set of the Little Monster Freaky Monster clear polymer stamp set!! SO!!!! You have 4 chances to win. 😱
Just leave a comment on as many social media platforms as you like:
Cards & More Crafts - here
Contest closes Sept. 25/20 and winner will be announced Sept. 26/20
https://youtu.be/01mMmHFwD4Q
GOOD LUCK!🍀
And as promised here is my video for the background of this card:
https://youtu.be/01mMmHFwD4Q
I hope you've enjoyed everything today!!
Have a great week!
Hugs,
Eulanda
Copics Used:
BG01, 02, 05, 07, 09
YG01, 03, 23, 63, 67
YR02, 04, 07, 09, 27
V12, 15, 17, 09
RV04, 06, 09, 19
Friday, September 11, 2020
Gnome More Rain Please
Welcome back because today I'm sharing another gnome from the recent super cute gnome set using a stencil for your background sky. 😀😁
This sweet image is called Gnome More Rain Please! I've coloured it with my copics and he just popped off the page! I used both my distress and oxide inks to color the Cloud Landscape craft stencil and Grass Lawn border craft stencil. I didn't have the proper oxide teal color so had to settle for the distress ink. Well, let me tell you I rectified that problem immediately! Guess what's coming in the mail?!! 😂😂 You might be able to tell the difference but maybe if I hadn't of mentioned it, a person wouldn't notice. I tend to favour the oxide inks more. What about you?
I added the "Love You Buckets" sentiment this clear polymer stamp set comes with using a die from the Posydoodle tags set. Again, I double layered it...I just can't help myself. 😃
For extras, I've layered some ribbon, corregated cardboard and a border die from my stash. I also added some clear Glossy Accents to any of the rain drops then sprinkled some loose glitter overtop. I used Stickles for the wooden butterflies. I find if I use Stickles on a Copic coloured image that the ink tends to bleed. Has that ever happened to you? Annoys me! 🤨 So are you a gnome lover? They are so adorable!
Thanks for stopping by! 💕
Eulanda
Copics:
V12, 15, 17, 09
Y11, 15, 17, 38, E19
YR15, 16, 07, E08
YG01, 11, 06, G05, G17
B32, 34, 37, 39
BG10, 11, 13, 18, 09
W1, 3, 5, 7, 9
E50, 53, 43, 47
E43, 44, 47, 49
Thursday, September 10, 2020
Subscribe to:
Posts (Atom)