Friday, March 26, 2021

MFT Hug It Out

I did share this on Facebook and Instagram but then I realized I had added my colours here so if nothing more, at least I have them documented.  LOL!

This is MFT's "Hug it Out" and OOOOOOOOOOOO this set is so stinkin' adorable I just couldn't refuse it!!  And I'm pretty sure we could all use a ton of hugs!!  I am so lucky that I actually have a hubby who gives the best hugs ever!  He's more than a head taller than me but he bends down to my height and softens right up and squeezes tight!  I never thought the day would come when I described the way my husband hugs me!!  LOL!!! 


I hope you all have a good and creative weekend!!
Sending you big, warm, squishy hugs!!  

Eulanda

Prismacolour Pencils:
_______________________________________________________________

Warm grey 10%, 20%, 30%, 50%, 70%
French grey 10%, 20%, 30%, 50%, 70%
Spring green, apple green, grass green, dark green
Cool grey 10%, 20%, 30%
Deco pink, blush pink, pink
White, sand, goldenrod, burnt ochre, light umber, dark brown

Polkadoodles Hyacinth

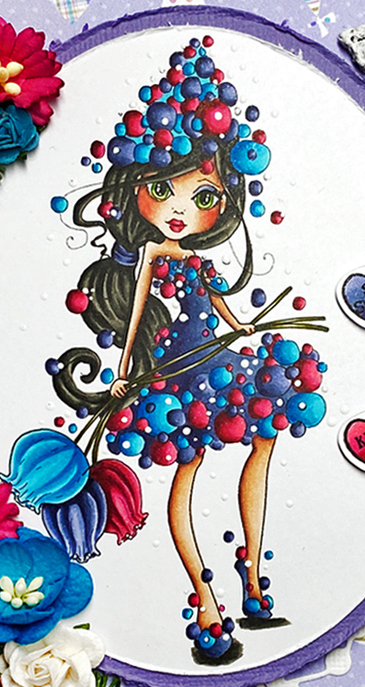
Hello and welcome back!!  Today I'm sharing a quick tip on how to shabby up those card edges!!  😀


I went with super bold colours on this card, more for a challenge because I wanted to see how the colours would turn out once completed.  Well, it's BOLD I'll say that.  LOL!  I printed out some papers from the Winnie Celebrations Kit 3 digi papers on PD's Ultimate Graphic 160gsm paper pack.

Not sure if you can see it but I snuck in the Delicate Daisy Corner craft cutting die into the left corner of the card and added flowers...albeit over top but you can still see it sticking out.  

I've used my copics to colour up this beauty digi called Hyacinth Darling Bud, which is also available in a clear polymer stamp.  


Aren't these Love Hearts just adorable?!!  I stamped them out onto copic paper, cut them using my Brother scan and cut then coloured them with the same combo that I used on the image.    


So my tip to create fast shabby edges is simply to use a Zutter!!  Check it out right here!  Just don't shove your paper into it because I know it's meant for heavier papers including chipboard and I've made that mistake myself.  🤣🤣🤣 

Thanks for stopping by!!  🥰

DISTRESSING EDGES VIDEO


__________________________________________________________

Copics:

B01, 02, 04, 05, 06
BV01, 34, 17, 08
W3, 5, 7, 9
RV13, 25, 29, 69
E000, 00, 04, 11, 21

Friday, March 12, 2021

Polkadoodles Honeypie Spring Lambs

 Today I'm sharing my latest card using a new digi image from the cute Honeypie line!


This image is called Honeypie Spring Lambs (svg file included) and I coloured the image using my Prismacolor pencil crayons (listed below).  I added some extra details such as the dots on her flowers and the crosshatch design on her hat.  AND THOSE LAMBS?!!  Soooo sooo adorable!  The matching papers that I've layered are from the Vintage Candy 6" x 6" paper pad.


I thought I would add a cute little sentiment using my labeler and also cut the sentiment out using PD's Posydoodle tags.  I added some pink distress oxide ink to the chipboard hearts and topped them off with some icicle Stickles for an extra sparkle.


Hope you enjoyed my card today and if you get a moment check out the new Honeypie collection!  They are super cute!

Hugs,
Eulanda
___________________________________________________

Cool Grey - 10%, 20%, 30%, 50%, 70%
Deco Pink, Pink, Magenta
Beige, Burnt Ochre, Sienna Brown, Chocolate, Dark Brown
Sky Blue, Non-Photo Blue, True Blue

Sunday, March 7, 2021

Stamping Bella - Curvy Girl Baker

I have to say I think this is one of my personal favourites lately. 🥰  I’ve created a shaker card and added some super cute clay lady bugs with some sequins and micro silver balls for the contents.  The image is Curvy Girl Baker from Stamping Bella and I think the sentiment is just so perfect.  I can eat cake anytime…even for breakfast.  LOL!  What about you?  


The papers are Frozen Roses from Ciao Bella and such pretty papers they are!  


I decided to dress up my card photo's with just a couple of extra's from my scrapbook program.  I used an online program to take away my original background and then added the background paper, sequins and ric rac ribbon embellishments.  I just wanted to try and up the ante so to say but I hope you like it!!  Figured it would be easier than actually finding all those pieces to match each card.  LOL!  

Thanks for stopping by!

Have a great week!
Hugs,
Eulanda

Friday, February 26, 2021

Winnie Sunshine Delight Bouquet

Welcome back!!  Today I'm going to show a behind the scenes look at my card.


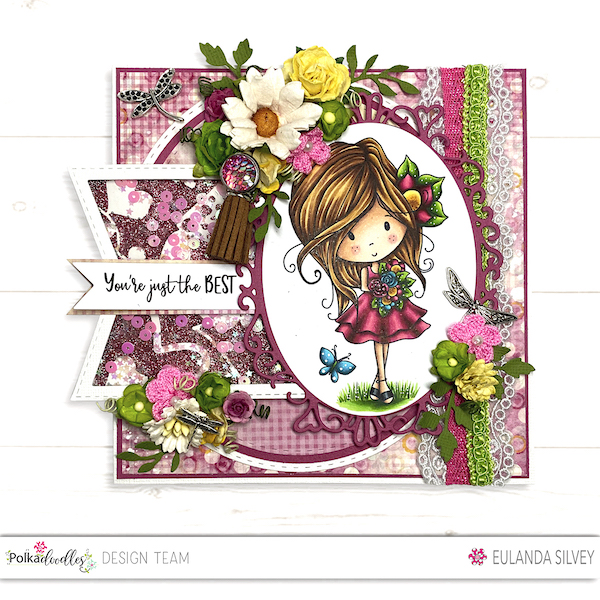
I feel like I'm pulling back the curtain in the Wizard of Oz!  🤣🤣 I started by printing out my papers from the Winnie Sunshine Delights Paper Pack 1 download using the Ultimate Smooth paper.  I know I rant and rave about this paper every time but honestly it's amazing!  I love it!!  I cut my layers using a round die for the very bottom of the card and then I added 3 layers of ribbon from my stash.  


Next I created a shaker element using the Timeless Rose Sweethearts stencil, covered with some bubble gum glitter gel and then added all my shaker contents. 


I've used the black and white digi Winnie Sunshine Delight Bouquet and coloured her using my copics.  This image is also available as a pre-coloured if you'd like to save some time and make a quick card!  I cut the image into an oval shape so it would fit perfectly in the Elegant Nest set of 3.


After all was layered up I added all my extra's and TA-DA!  Done!  I wish it was as quick and easy as TA-DA sounds like.  🤣🤣 It does take me awhile to create these cards but I love the process as I don't think about anything else but what I'm creating.  Great escape!!

Thanks for stopping by!
Hugs!
Eulanda
______________________________________________________

Copics:

Y11, 15, 17, YR21, 23
BG01, 02, 05, 07, 09
YG01, 05, 07, 17, G28
RV13, 25, 29, 69
Y21, 23, E15, 18

Friday, February 12, 2021

Sunshine Delights Cheeky

Hi there!!  Today I'm sharing a cutie patootie Winnie image that I popped on a nice circular shaped card.  


I've used this super sweet black and white digi image Sunshine Delights Cheeky which is also available as a pre-coloured image and used my Brother Scan N Cut to cut her out.  No way could I actually fussy cut anything this well.  LOL!  I added some details to her dress by using the darkest copic color in my combo and although it's not much, it does make difference.  My combo's are listed below.  ðŸ˜€


I used the Sentimentals 6" x 6" paper pack before and I LOVE it!  There are so many useable sentiments that you can share on your cards and suitable for lots of occasions.


Here I've added some Wild Orchid Flowers and some extra embellishments I found on Ebay awhile ago.  Don't you just love the little blue mushroom?  I've been wanting to use that forever!  Sometimes I but something and then later almost have to build my card around the silly little thing.  LOL!  Have you ever done that?


The Ultimate Graphic paper is the absolute BEST for printing PD papers and allows you to skip any edits you might think you need.  The papers I've used are Winnie Sunshine Delights Paper Pack 2 digi and an absolute great selection!!  Another favorite of mine!!   


Love these Winnie images!  Do you manage to snag some Digi ChoosedayENABLER ALERT!   Check out the link as there is always a challenge going and on Tuesday a fabulous discount!!  🤣🤣🤣🤣

I hope you're keeping well in these unknown times.  I thank goodness I have my crafting.  Keeps me sane ... kinda.  ha ha ha ha!! 

Thanks for stopping by!
Eulanda
_________________________________________________________

Copics:
B01, 02, 04, 05, 06
Y11, 15, 23, 38
E000, 00, 04, 11, 21
W3, 5, 7, 9
YG05, 07, 17, G28